.png)
.png)
What Is a Shadowbox Fence?
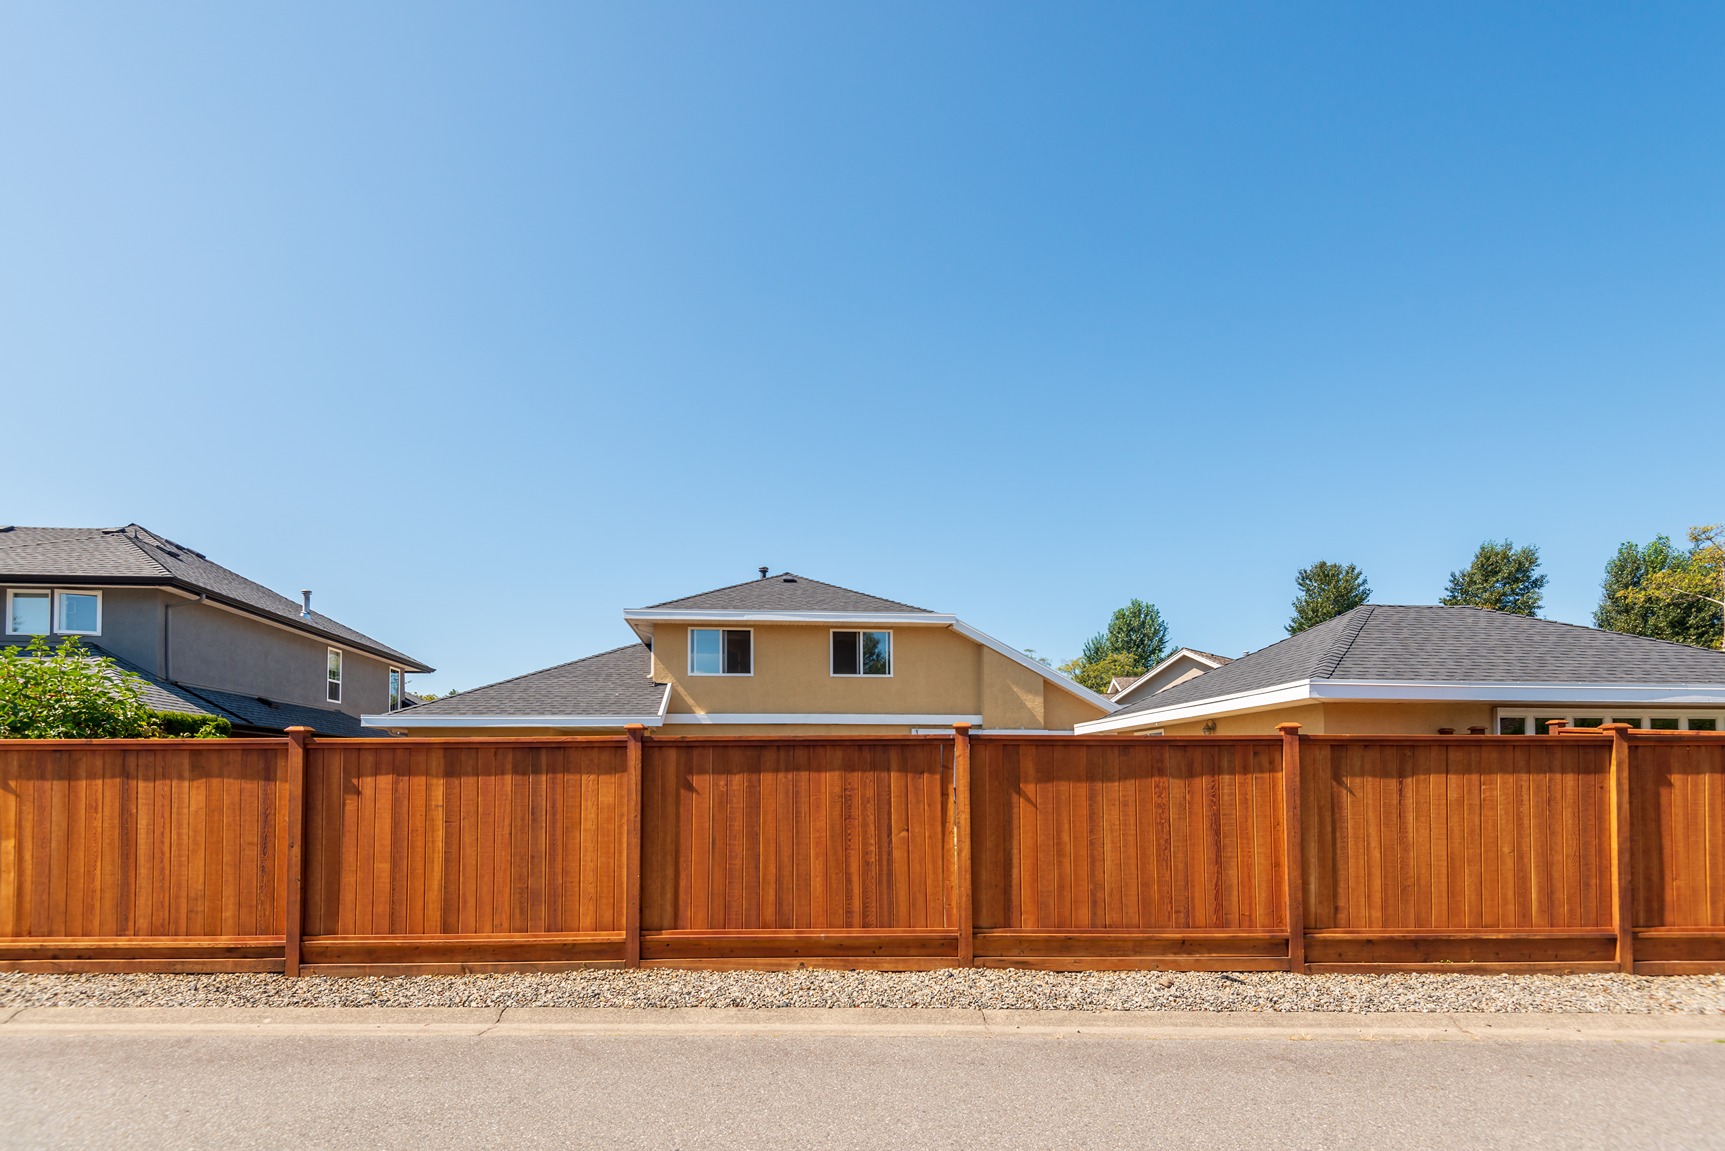
A shadowbox fence, sometimes called a good neighbor fence, places pickets on alternating sides of the horizontal rail. From either yard, the fence looks finished and solid. But because the boards don't overlap completely, air still passes through.
That distinction matters more than it sounds. A solid privacy fence acts like a wall against the wind. A shadowbox design lets the breeze through, which reduces the pressure on your posts and rails over time. In Bellevue, where wind and rain put real stress on outdoor structures, that's a practical advantage, not just a design preference.
A few things that make it stand out:
- Both sides of the fence have a clean, finished appearance
- The semi-open design reduces wind load on posts
- Picket spacing can be adjusted for more or less privacy
- It works in wood, vinyl, and composite materials
If you're considering how to install a shadowbox fence yourself, that last point matters. Not every material or style installs the same way.
Shadowbox Fence Design Options to Know Before You Build
Before you pick up a post hole digger, a few design decisions will shape your material list and your timeline.
Orientation: Vertical shadowbox fencing is the classic look and the easier build. Horizontal layouts are popular right now for a more modern feel, still they require more precise post alignment and don't handle moisture as well at the board ends.
Picket style: Dog-ear pickets have clipped top corners and give the fence a softer, traditional profile. Flat-top pickets read as cleaner and more contemporary. Both work for the shadowbox installation.
Material: Use Western red cedar for pickets and rails, pressure-treated lumber for posts. Cedar handles moisture well above ground; pressure-treated is built for ground contact, where cedar falls short. For lower long-term maintenance, vinyl panels are worth the higher upfront cost.
Height: Bellevue allows fences up to 8 feet without a permit. Front-yard fences are capped at 4 feet 6 inches within the required setback. Corner lots and properties near intersections have separate sight-line rules. Confirm your specific lot restrictions before settling on a height.

How to Install a Shadowbox Fence: What You'll Need
Getting your materials and tools together before you start saves you two or three extra hardware store runs mid-project.
Materials:
- Fence posts (4x4 or 6x6 cedar or pressure-treated)
- 2x4 horizontal rails
- Dog-ear or flat-top pickets
- Fast-setting concrete mix
- Gravel for post base drainage
- Galvanized screws or nails
- Gate hardware if you're including an entry point
Tools:
- Post hole digger or rented auger
- 4-foot level
- Tape measure and mason's string line
- Circular saw
- Drill and bits
- Speed square
- Spacer block (cut a scrap piece to your gap width)
If you're using pre-built shadowbox fence panels instead of building board by board, your material list gets shorter. You still need the same post and rail setup, but the panel installation goes faster once the posts are set.
Step-by-Step: How to Install a Shadowbox Wood Fence
Here's where the actual work starts. These steps cover shadowbox fence installation for a standard 6-foot cedar build on a relatively flat lot.
Step 1: Check Bellevue's Permit Requirements
Start here, not at the hardware store. Bellevue doesn't require a permit for fences 8 feet and under, but setback rules, easements, and the 4-foot-6-inch front-yard limit still apply. Fences near driveways or intersections have additional sight-line restrictions. One call to the Development Services Center before you dig clears all of it up.
Step 2: Confirm Your Property Line
Use your property survey or plat map to verify where your line actually sits. On tighter Bellevue lots, a few inches of error can mean building on your neighbor's property. If you don't have a current survey, it's worth spending the money on one before you dig. Metal survey pins are sometimes still present at corners. A metal detector can help you locate them.
Step 3: Mark and Dig Post Holes
Stake out your fence line with mason's string pulled taut between corner stakes. Mark post locations every 6 to 8 feet along the line.
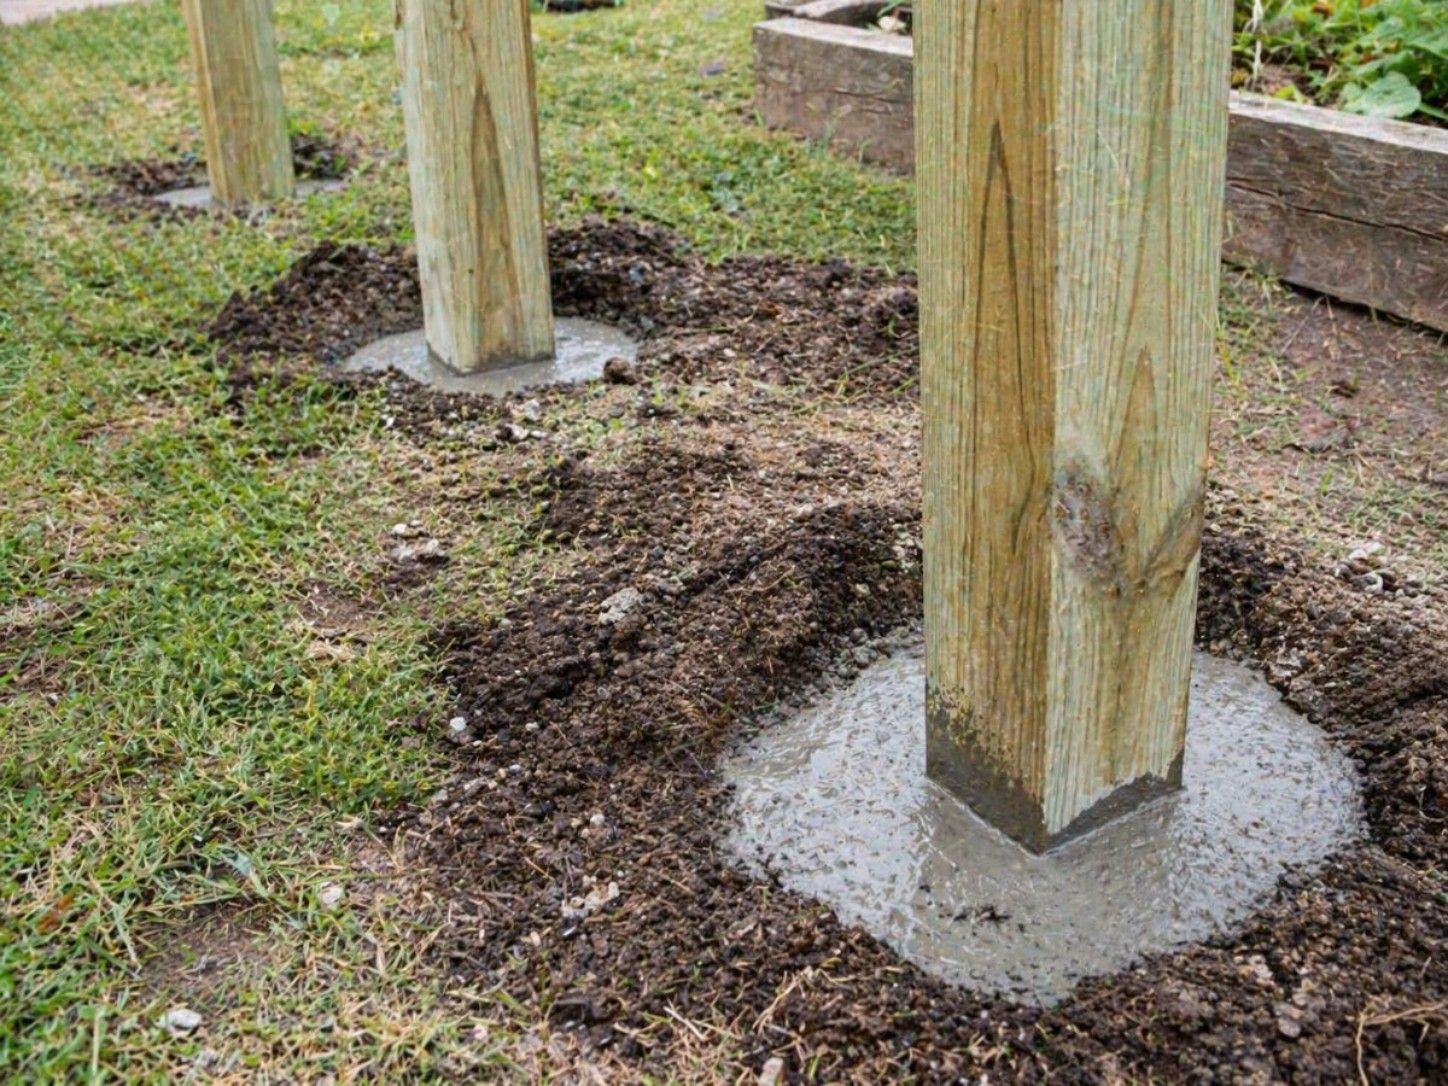
Post holes should be one-third the total post length deep. For a 6-foot fence using 9-foot posts, that means 3-foot holes. Add 4 to 6 inches of gravel at the bottom of each hole before setting the post. In Bellevue, that drainage layer is not optional. Standing water at the base of a post is how rot starts.
Step 4: Set Posts in Concrete
Pour fast-setting concrete around each post and check plumb on two perpendicular sides before it sets. Brace with 2x4 stakes for about 4 hours until the post holds on its own, but don't attach rails or pickets the same day. Full cure takes longer, and a post that shifts early affects everything after it.
Step 5: Attach the Horizontal Rails
For a 6-foot fence, use three rails: one near the top, one in the middle, and one near the bottom. Run a string line along the fence to keep rail height consistent across all spans. Pre-drill your pilot holes to avoid splitting the cedar, especially near the ends.
Step 6: Install Pickets in the Alternating Pattern
This is the step that defines shadowbox fencing. Start on one side of the rail, spacing pickets with a consistent gap. A gap of 1.5 to 2 inches is standard. Cut a scrap piece of wood to that exact width and use it as a spacer as you go.
After every two or three pickets on one side, place a picket on the opposite side of the rail, centered over the gap. Check your level every four or five pickets. Do not eyeball it. The pattern looks off fast if you let small errors accumulate.
Step 7: Frame and Hang the Gate
Set gate posts during the initial installation. They carry more load than line posts and need the same concrete setup. Frame the opening, add a diagonal brace from the bottom hinge corner to the top latch corner, and use hinges rated for the gate's actual weight. Most early gate sag comes down to skipped bracing or undersized hardware, both easier to get right the first time.
Step 8: Seal and Finish the Wood
Cedar is naturally moisture-resistant but still needs a water-repellent sealant or stain within a few weeks of installation. In Bellevue, your fence will take months of rain before it sees a dry summer. Re-seal every two to three years. Most people skip this step when they install a shadowbox fence themselves, and it's usually why pickets and posts fail early.

When Hiring a Pro Makes More Sense
DIY shadowbox fence installation is genuinely achievable if you have some construction experience and the time. But a few situations make professional installation the smarter call for Bellevue homeowners.
- Your yard has a significant slope. Racking or stepping a fence properly on a grade is one of the more technical parts of the job and looks bad when it's done wrong.
- You share a fence line with a neighbor. A contractor handles the coordination, the permit, and the liability.
- You're on a corner lot with specific Bellevue sight-line restrictions for fence height near intersections.
- You want cedar that's properly dried and graded, not whatever the big-box store has in stock that week.
- You've never set posts in concrete before. A post that cures out of plumb at even one degree becomes obvious by summer.
A properly installed shadowbox fence in the Pacific Northwest, with the right post depth and treated materials, will hold up for 15 to 20 years with basic upkeep. Getting the foundation right from day one is what makes that realistic.
Keeping Your Shadowbox Fence in Good Shape
Once it's up, maintenance is simple if you stay consistent.
- Check post bases every spring for soft spots or movement
- Re-drive or replace any picket screws that are backing out
- Clear leaf and debris buildup from the base of the fence after fall rains
- Reapply sealant or stain every two to three years
- Watch for moss growth on north-facing sections. A diluted bleach solution handles it before it becomes a bigger problem
Worth the Work if You Do It Right
Learning how to install a shadowbox fence properly pays off long-term, especially on Bellevue properties where weather and lot conditions add real variables. It handles Pacific Northwest weather better than a solid privacy fence, it looks finished from both sides, and it holds up well on the kinds of mid-slope lots that are common throughout the city. Whether you go DIY or hire out, the key is getting the post installation right and using materials suited for this climate.
If you'd rather skip the weekend project, Optima Fence and Deck handles installations like this across Bellevue and the Eastside. Reach out today for a free estimate and let's figure out the right setup for your yard.
FAQs
How deep should fence posts be for a shadowbox fence?
Post holes should be one-third the total post length deep. For a standard 6-foot fence using 9-foot posts, that means 3-foot holes. In Bellevue, adding 4 to 6 inches of gravel at the base before setting the post improves drainage and helps prevent rot at the base.
Do I need a permit to install a fence in Bellevue, WA?
Bellevue doesn't require a permit for fences 8 feet and under. Setback rules, easements, and the 4-foot-6-inch front-yard limit still apply regardless of height. Confirm your specific lot restrictions with the Development Services Center before you start digging.
What is the difference between a shadowbox fence and a board-on-board fence?
A board-on-board fence has overlapping pickets on the same side of the rail with no gaps, creating a fully solid barrier. A shadowbox fence alternates pickets on opposite sides of the rail, leaving small gaps that allow airflow. Both offer privacy, but shadowbox fencing handles wind better and looks finished from both sides.
How much does shadowbox fence installation cost in Bellevue?
Costs vary depending on material, height, linear footage, and site conditions. Cedar shadowbox fencing in the Bellevue area generally runs higher than national averages due to labor rates and material costs in the Pacific Northwest. Getting a local estimate from a licensed contractor gives you the most accurate number for your specific lot.
Can I install a shadowbox fence on a sloped yard?
Yes, but it requires either racking the fence panels to follow the grade or stepping them in sections. Both methods require more planning and precision than a flat lot install. If your yard has a significant slope, this is one of the strongest reasons to hire a professional rather than DIY.
How long does a wood shadowbox fence last in the Pacific Northwest?
A cedar shadowbox fence that's properly installed with the correct post depth, drainage, and regular sealing typically lasts 15 to 20 years in the Pacific Northwest. The biggest factors in early failure are posts that weren't set deep enough and wood that was never sealed after installation.
What wood is best for a shadowbox fence in Bellevue's climate?
Use Western red cedar for pickets and rails. It resists moisture above ground and holds stain well. Use pressure-treated lumber for posts, which sit in ground contact where cedar's natural resistance falls short. Most Pacific Northwest fence contractors use both for exactly this reason.
How far apart should pickets be on a shadowbox fence?
A gap of 1.5 to 2 inches between pickets on the same side is the standard range. Narrower gaps increase privacy but reduce airflow. Using a cut spacer block during installation keeps your spacing consistent across the entire fence run.


.png)